


Installing a new bathroom faucet is an easy yet effective way to update your bathroom and give the area a fresh start. A faucet update is a satisfying do-it-yourself job that you can confidently take on, regardless of your goals—improving functionality or aesthetic appeal. With the help of this in-depth guide, you will be able to update the style of your bathroom by learning how to install a new bathroom faucet in five simple stages.
Tools and Materials
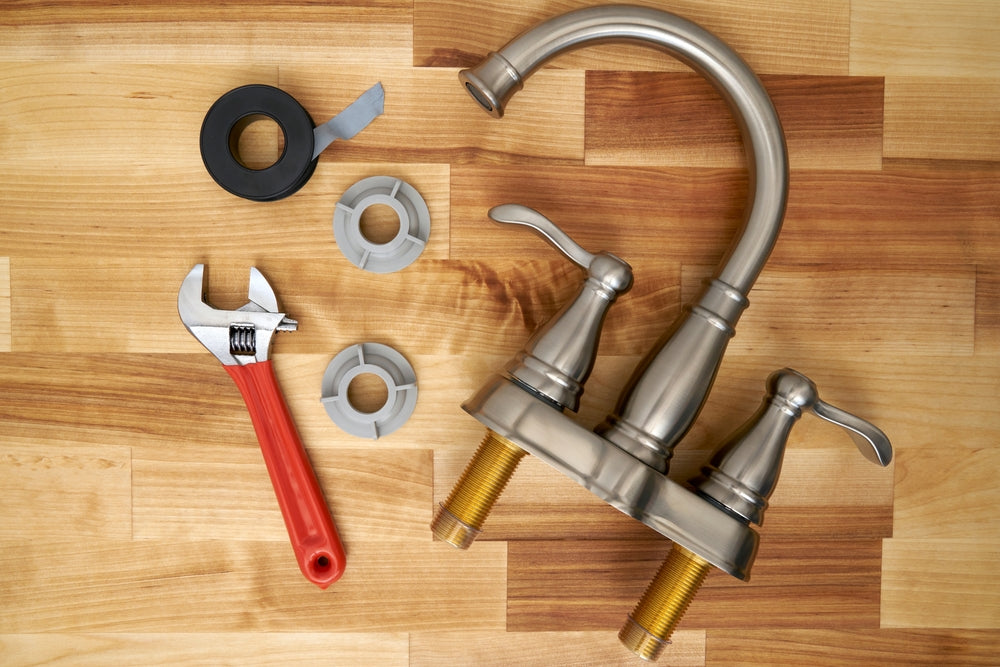
Here are the tools and materials needed to carry out the installation:
- New bathroom faucet
- Adjustable wrench
- Plumber's tape
- Plunger
- Buckets or towels
5 Steps to Installing a New Bathroom Faucet
Step 1: Gather Materials and Turn Off the water supply.
Getting the required supplies and equipment together is the first step in any plumbing project. You will need an adjustable wrench, plumber's tape, a plunger, a new bathroom faucet, and a bucket or towels to catch any leaks in order to complete this faucet installation. It's important to turn off the bathroom's water supply before you start. The main water supply to your home may need to be turned off if the shut-off valves that most sinks have beneath them are missing. Put some towels or a bucket underneath the sink to collect any leftover water to avoid a mess.
Step 2: Remove the Old Faucet
After safely shutting off the water supply, unplug the supply cables with an adjustable wrench. Prepare a bucket or towels in case any water leaks during this procedure. After removing the supply lines, find the nuts beneath the outdated faucet and loosen them. You may require an adjustable plier or a basin wrench, depending on how tight it is. Using a penetrating oil or lubricant can facilitate the removal process if the tap appears to be stubborn. Here, the key to not causing any damage is patience.
Step 3: Clean the Area
After removing the old faucet, give the surface a thorough cleaning. Clear away any debris or leftover caulk from the area surrounding the faucet holes. A spotless surface guarantees the new tap fits properly. In addition, clear out any possible clogs in the drain with a plunger. By taking this easy action, you can ensure that the water flows smoothly and avoid problems later.
Step 4: Install the New Faucet
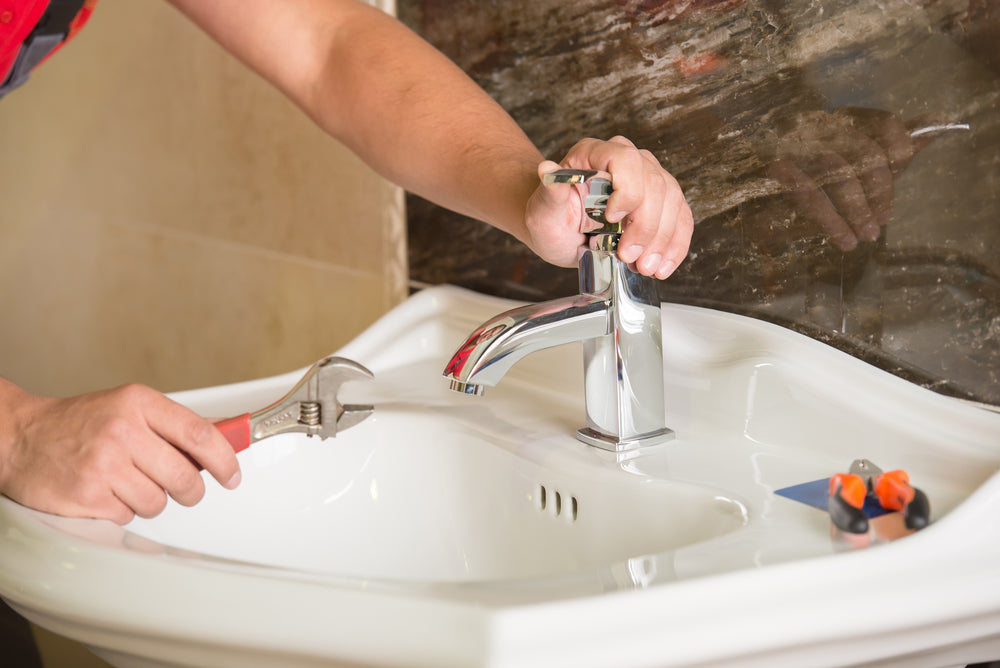
Install the faucet through the holes provided, making sure it is level and centred. Tighten the included nuts from underneath, being careful not to overtighten, as this could cause damage to the sink. As directed by the manufacturer, apply plumber's tape to the threads of the supply lines to ensure a tight and leak-free seal when installing a bathroom faucet.
Step 5: Connect Supply Lines and Test
The new faucet needs to be connected to the hot and cold water supply lines during the home stretch. Don't forget to apply plumber's tape to the threads to ensure a stable connection. After attaching the supply lines, gradually turn on the water supply. Watch for any leaks, and tighten the connections even more if you find any. To clear any debris from the new tap, let the water run for a few minutes. This last action makes sure that your newly installed tap is operating at its best.
Common Bathroom Faucet Issues and How to Fix Them

An essential part of your daily routine is your bathroom faucet, which supplies a constant flow of water for a variety of uses. However, problems with faucets can arise and impair their performance, just like with any other plumbing device. We'll go over a few typical bathroom tap difficulties in this article, along with step-by-step instructions to help you solve them. You can troubleshoot and correct these issues with a little do-it-yourself knowledge.
1. Issue of Low Water Pressure
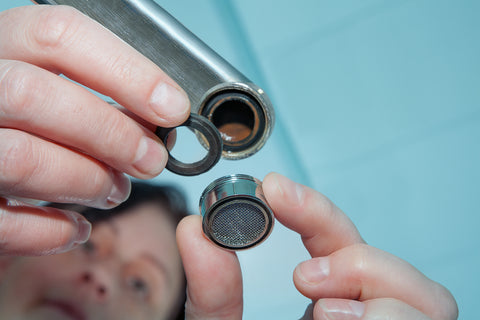
This can be annoying, particularly for jobs that require a high flow, like filling a container or washing your hands.
The solution to this is to first examine the Aerator: A blocked aerator is frequently the source of low water pressure. Remove the faucet's aerator by unscrewing it, then clear away any leftover silt or debris. If there is damage to the aerator, think about replacing it.
Inspect the Supply Lines: Verify that all of the supply lines underneath the washbasin are open. Low water pressure may be caused by a partially closed shut-off valve or sediment accumulation.
2. Leaks from faucets
If leaks are not fixed, they can cause water damage in addition to being wasteful. Leaks might appear at the handles, from the spout, or around the base of the tap.
Solution is to first tighten Connections: Examine all of the connections, particularly the ones surrounding the faucet handles and under the sink. In order to tighten any loose nuts or connectors, use an adjustable wrench.
Replace O-Rings: Worn-out O-rings are frequently the cause of leaks near the faucet's base. After disassembling the tap and replacing the O-rings, turn off the water supply.
3. Dripping Faucet

To fix this, you can replace the cartridge or valve: A worn-out cartridge or valve is often the cause of drips from the spout. Determine the sort of faucet you have, cut off the water supply, and replace any damaged parts.
4. Noisy Faucet
When you turn on or off the tap, strange noises like squeaking or hammering may point to underlying problems.
To fix this, you can install a Water Hammer Arrestor: Noisy faucets might result from water hammer, which is produced by a sudden cessation in water flow. Install a water hammer arrestor to stop the noise and cushion the impact.
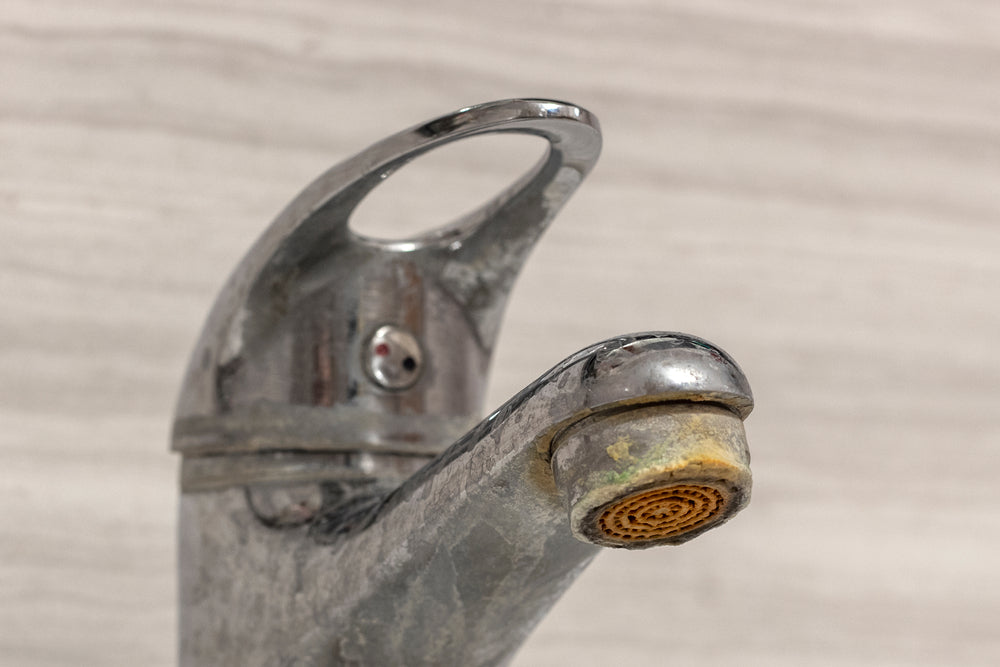
5. Issue of Rust or Mineral Buildup
Mineral deposits or rust can build up over time and impact the look and performance of your tap.
To solve this, clean with Vinegar: Wrap the affected area with a cloth or paper towel that has been soaked in vinegar. For the mineral deposits to dissolve, let it sit for a few hours. Use an old toothbrush or a soft brush to clean the faucet.
Frequently Asked Questions (FAQs)
1. How often should I clean my faucet?
The amount of water hardness, usage, and finish type of your faucet all determines how often you should clean your tap. But generally speaking, cleaning your tap on a regular basis will keep it looking good and working properly. Here are some Cleaning suggestions:
-
Regular Cleaning:
Use a gentle, wet cloth to clean your faucet on a regular basis to get rid of surface grime, soap scum and water stains. To clean the tap surfaces, use a moderate cleaning solution or mild soap. Abrasive cleaners should be avoided since they may harm the finish of the faucet
-
Weekly Cleaning:
Consider a more thorough cleaning on a weekly basis especially if you notice any buildup. Wipe the handles and spout of the tap with a soft cloth or sponge. A vinegar and water combination can be effective for mineral deposits or stains caused by hard water. Wrap the affected areas with a cloth or paper towel that has been soaked in the solution for 10-15 minutes. Next, use a soft brush or an old toothbrush to gently scrub.
-
Monthly Maintenance:
Check the aerator once a month for any buildup of minerals or debris. To make sure there is a steady water flow, unscrew the aerator and clean it. To get rid of tenacious residues, immerse it in a vinegar solution if needed.
-
Immediately Clean up:
Spills and splashes should be cleaned up right away to avoid water streaks and stains.
Keep in mind that depending on the type of faucet finish and material, there may be differences in the precise maintenance and cleaning guidelines. Always follow the instructions provided by the manufacturer when cleaning a specific model of faucet.
-
Preventive measures:
If your water is hard, think about installing a water softener to help lessen the buildup of minerals on your tap.
Wet sponges or towels should not be left on the tap for an extended amount of time as this can encourage the growth of mildew or mold.
2. Can I replace a single-handle faucet with a double-handle faucet?
To change a single-handle faucet to a double-handle tap, there are a few considerations to keep in mind:
-
Number of holes:
Verify how many mounting holes are in your countertop or sink. While double-handle faucets often require three holes (one for the spout and two for the handles), single-handle faucets usually only need one hole. You might need to acquire a base plate to hide the extra holes or choose a single-handle tap if your arrangement has just one hole.
-
Plumbing Compatibility:
Verify the compatibility of the plumbing connections. A double-handle faucet's water lines could be spaced more apart than a single-handle faucet's. You may need to replace or change the supply lines if the water lines on the new faucet don't match the connections that are already in place.
-
Valve Type:
Take into account the kind of valves that are currently in your tap. Double-handle faucets might feature compression, cartridge, ball, or ceramic disc valves, but single-handle faucets usually have ball or cartridge valves. Verify that the type of valve on the new tap is compatible with the plumbing system you currently have.
-
Installation:
Some plumbing work is required when installing a new tap. To ensure a proper installation, it's best to employ a professional plumber if you're not comfortable doing plumbing duties yourself.
Measure the distance between the current mounting holes and verify compatibility by consulting the new faucet's specifications before making a purchase. It's wise to obtain advice from a licensed plumber if you have any doubts about any part of the installing a bathroom faucet.
3. What is plumber's tape, and when should I use it?
Plumber's tape is a thin, white tape used in plumbing applications to form a watertight seal between threaded pipe connections. It is sometimes referred to as Teflon tape or thread seal tape. It is usually composed of a material called polytetrafluoroethylene (PTFE).
-
When to use plumber's tape
Plumber's tape comes in particularly handy for tapered pipe threads. Showerheads, faucets, and other plumbing equipment frequently have these threads on them.
By sealing the spaces between the threads and filling the gaps, the tape stops water leaks.
Plumber's tape's main function is to add another line of defense against leaks in threaded connections. It prevents leaks and lessens the possibility of water seeping through the threaded joints by assisting in the creation of a tight, waterproof seal.
Conclusion
Prior to beginning any repairs, always remember to turn off the water supply. If the problems continue or appear too complicated, don't be afraid to contact a professional. Your bathroom faucet can be kept in top shape with minimal maintenance, giving you a smooth and dependable supply of water.
Installing a new bathroom faucet is an easy do-it-yourself. Its improvement adds better usefulness to your bathroom in addition to improving its aesthetic appeal. You've made a great start towards making your bathroom a more fashionable and useful area.